

Unpacking
Make sure the box is facing the right way up by checking for indicators on the box or by simply following the external branding. Carefully lift the PC from it's box and place it on secure surface.
Remove the outer protective materials until you’re left with just the PC - we recommend keeping the packaging intact until you’re up and running (just in case for any reason you need to transport the PC back to us).

Internal Protection
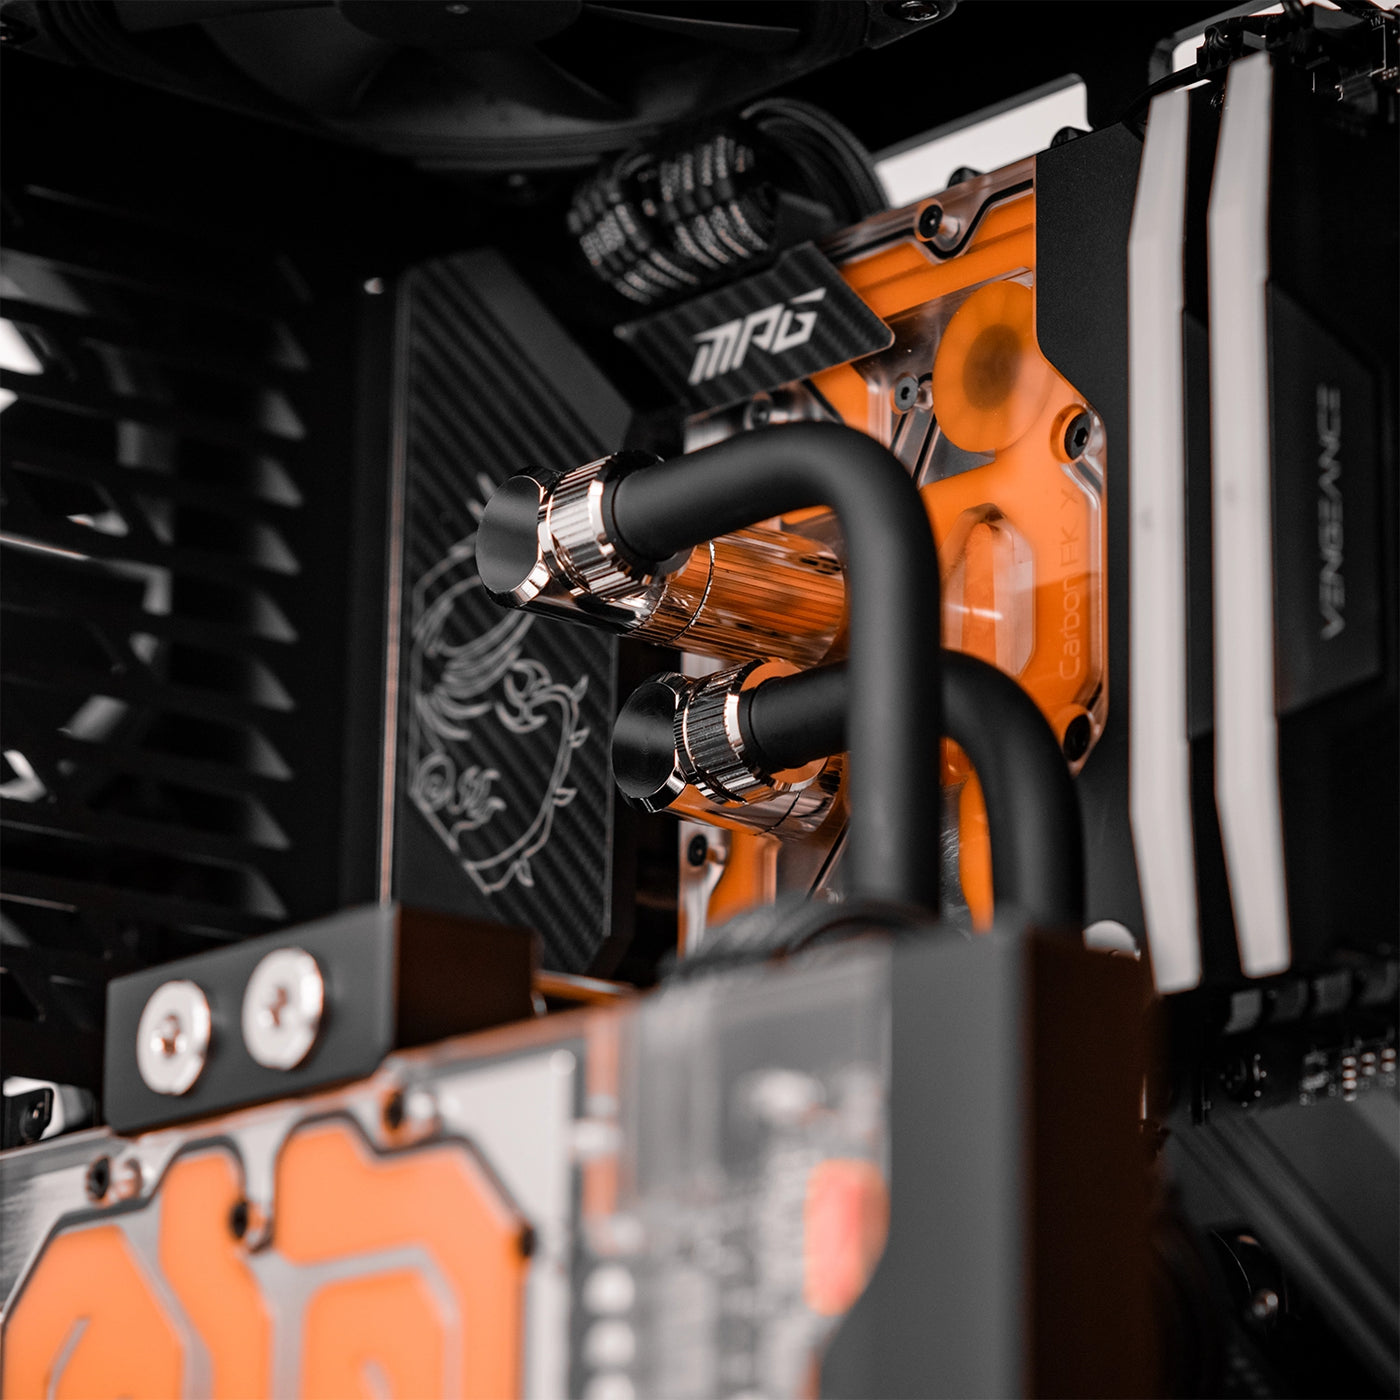
To prevent damage during transit we fill the inside of the PC with additional protective material - this helps keep your PC internals from coming loose, and braced for any potential bumps on the road to your doorstep.
IMPORTANT - You will need to remove this material before turning your PC on - to do so, remove the side panels from the case and carefully remove all packing material. It's important to remove all of the internal packaging or you may risk damaging components when powering the system on.
Note: some cases with more unconventional designs are opened from the top/bottom/front case panels

Getting Connected
After putting your case side panels back on - we can now start plugging things in. Start by plugging the power cable into the power supply (generally located at the rear towards the bottom of the case).
Next we can connect our display cables to the graphics card (video card or GPU). Generally the graphics card is the horizontal slot about halfway down the back of the PC. The graphics card may also be vertically aligned in some cases - simply look for the interface with 2-3 expansion slots filled.
PCs with WiFi/Bluetooth compatibility will have wireless antenna included with accessories pack. You will need to install these in order to utilize WiFi and Bluetooth properly. Locate the brass screw-on connectors on your motherboard (next to the 3.5mm audio ports) and screw on your wireless antenna(s).

Power On
Now it’s time to give it some power. Be sure to check the power supply is switched on by making sure the switch is in the “I” position.
Press the power button. Your PC should now show signs of life with fans spinning and your monitor showing a connection.
Note: If any unusual noise is heard upon startup we recommend powering the PC off immediately and checking for any internal packaging left inside.
If all seems well, you’re now ready to connect your peripherals and additional devices. Congrats - you can now put your brand new PC to work! Enjoy.
Frequently Asked Questions
How should I unbox my new PC?
How should I unbox my new PC?
Start by gently opening the box and taking out everything inside. This includes your PC, accessories, and any paperwork that came with it. It's a good idea to keep the packaging in case you ever need to transport or move your PC.
What do I do with the protective materials?
What do I do with the protective materials?
Your PC might be wrapped in foam, plastic, or bags for protection. Carefully remove all of this. If you find protective foam inside the PC itself (used to keep parts safe during shipping), open the side panel and take it out. After removing the foam, double-check that all components are securely in place.
How do I connect my keyboard, mouse, and monitor?
How do I connect my keyboard, mouse, and monitor?
Plug your keyboard and mouse into any USB port on your PC, either in the front or back. Connect your monitor to the correct port on your graphics card—this could be HDMI, DisplayPort, etc. If your PC has a dedicated graphics card, make sure to avoid using the video ports on the motherboard. You can also connect any other peripherals, like speakers, external drives, or printers, at this time.
How do I connect the power supply?
How do I connect the power supply?
Plug one end of the power cable into the power supply unit (PSU) on the back of your PC, and the other end into a grounded electrical outlet or surge protector. Check that the power supply switch, located near where you plugged in the cable, is switched to the "on" position.
Where should I place my PC?
Where should I place my PC?
Find a spot with good ventilation, giving it at least a few inches of space on all sides for airflow. Try to avoid placing your PC on thick carpet or in tight, enclosed areas that could block ventilation.
What should I check before turning on my PC?
What should I check before turning on my PC?
Make sure all your cables—power, monitor, keyboard, mouse—are firmly connected. If you added any components yourself, like extra storage drives or a graphics card, ensure they’re properly installed. Finally, turn on your monitor and make sure it’s set to the right input source.
How do I power on the PC for the first time?
How do I power on the PC for the first time?
Simply press the power button, which is usually located on the front or top of your PC case. As it starts up, keep an eye (or ear) out for any error messages or beeps, as these could signal a problem with the hardware or connections.
What if the PC doesn’t start or the monitor shows no signal?
What if the PC doesn’t start or the monitor shows no signal?
First, check that the power supply switch is on. Ensure your monitor is connected to the graphics card port, not the motherboard. If necessary, try reconnecting the power and monitor cables to make sure they’re secure. If the problem persists, refer to our troubleshooting guide or get in touch with customer support.
The PC makes a clicking noise when I turn it on.
The PC makes a clicking noise when I turn it on.
This likely means that the internal packaging hasn’t been removed. Open the side panel of your PC and carefully take out any protective packaging inside. This material is placed there to keep the components secure during shipping.
How do I connect my PC to a network?
How do I connect my PC to a network?
To connect your PC to the network, you have two main options: wired or wireless. For a wired connection, plug an Ethernet cable (with an RJ45 connector) into your PC’s Ethernet port and connect the other end to your router or network outlet. If you’re using Wi-Fi, first check if your PC has built-in Wi-Fi capability—not all PCs do. If your PC supports Wi-Fi, attach the external antennas (if provided) to enhance signal strength. Then, connect to your Wi-Fi network by selecting it from the available networks list and entering your Wi-Fi password.
How do I set up my operating system?
How do I set up my operating system?
When you turn on your PC for the first time, you’ll typically be guided through the operating system setup. This process usually includes creating a user account, connecting to a network, and updating Windows. Just follow the on-screen instructions to get everything set up.
Note: Not all PCs come with an operating system pre-installed. Be sure to check your PC's specifications to confirm whether you'll need to install an OS yourself.